Humble Mechanic Logo

Happy New Year everyone! I hope that you all had a great holiday season! Today we are officially kicking off 2014 on the blog. 2013 was a crazy busy year for me. Between moving in early February, and getting the Cabby VR6 running the year flew by.

What is in store for 2014?
This year will be the best year of the blog yet. In early February I will be traveling to the Chicago Auto Show for media day. My hopes are that will open the door for more big time car shows, SEMA maybe? I will be sure to keep you guys all filled in on the cool stuff from the show.

  • The blog will most likely be getting a facelift. I like the style we have been rocking for a while, but it’s time for a change.
  • We still have some work to do on the Cabby. She runs but great, but there is still work to be done. I have some wiring to finished up. I also need to get the interior put back together.
  • I am hoping that this year I can redo my garage at the house. Not sure if a full makeover is in the budget this year, but we are going to try.
  • Fine tuning the Podcast. I will be adding more podcasts this year. Plus a good buddy of mine wrote some awesome intro music.
  • I am going to get the “Does My Car Really Need This” fired back up. It seems to be one of the more popular posts.
  • I have a new guy that I am training. He is pretty sharp. Wait until you hear the coolest thing about him.
  • Shop Shots will still be a main part of the site. 😉
  • I have started to do more tool reviews. I will be sure to share all the reviews that I do.
  • I also have a few contests, and giveaways planed. Let’s just say

The short hiatus has been really good for me and my family. We have done lots of work around our homestead. We have been clearing about 7-10 years of intense over growth. It is so think in some spots you can’t even see through it. My wife has taken the lead on the homestead blog. If you want to see some pic around the homestead, check out the NCHomesteading page on Facebook. Here is a picture I took out on the homestead yesterday.

Homesteading in NorthCarolina

Tool Lodge Storage

Hey everyone. I am having a hard time wrapping my mind around the fact that it is December 6th already. This year has been sort of a blur. For the blog it has been an AWESOME year. I may not say it enough, but I really do appreciate each and every one of you. You guys seriously rock.

Today I want to chat a little about tool storage and Tool Lodge Storageorganization. This is a very personal thing for a lot of people. Things get even crazier when you bring it to a professional level. Every one organizes things different. At work, I stage things in a way to get to them fast. At home, I like things nice and pretty. To be honest, my tools at home are a mess. 🙂

The folks at Tool Lodge were nice enough to send me a sample of their tool drawer organizer. They asked me to check it out, and give them my thoughts. I did that, and I figured I would share them with all of you as well. One quick thing, Tool lodge did send this to me at no charge. But as you all know, I give my honest opinion no matter what. That is how I roll.

Overall I think the product is well built. It is a foam wrapped in a felt type material. The backing is plastic and seem to be pretty supportive. You can even add magnets to the bottom. That would be good if the holder will not cover the entire drawer. Here are a few pictures of the process.

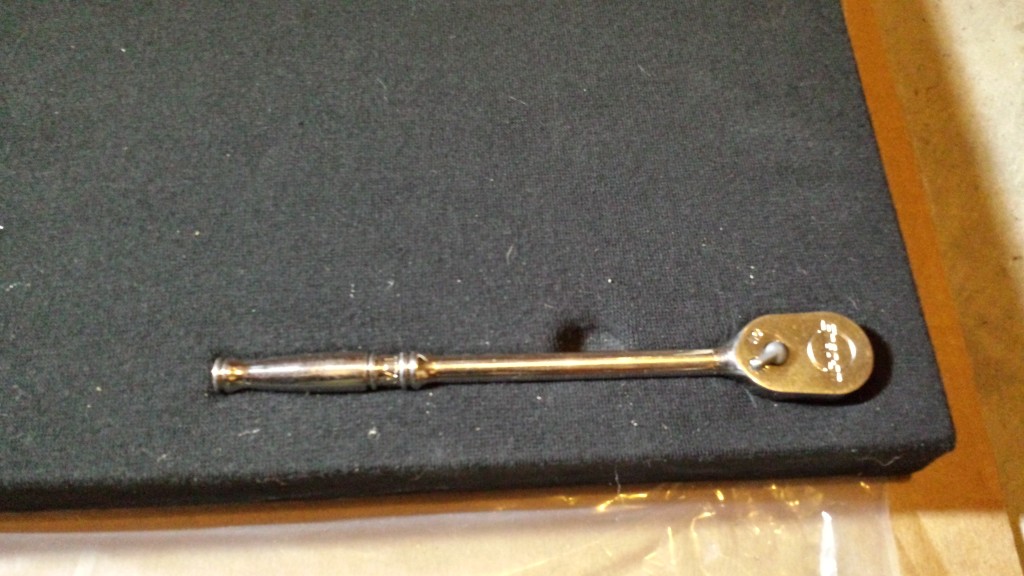
Orginize The ToolsHere is a shot of some tools set out. The most important thing seems to be laying out your tools properly. If you look to the bottom left of the picture, you can see that I punched a ratchet into the foam.
Tool box storgage Tool Lodge

This is a close up of the ratchet I pressed into the foam. Pressing a tool seemed very easy to do. I was able to apply pressure by hand and set the tool so it would not move. Then I tapped the tool down into the foam. Tool Lodge recommends using a soft (rubber or plastic) mallet. I used a regular hammer and a block of wood. It worked great!

Tool box storgage Tool Lodge

This is the imprint of the ratchet in the foam. You can see it does a good job of forming to the tool. You can even see the lines of the handle. If you look at the middle of the imprint, you can see an section pressed in that does not fit the ratchet shape. This is from the supplied grip tool. It lets you dent a spot to be able to grab the tool. This is one of my favorite parts about this system.

Tool box storgage Tool Lodge

I also wanted to see how a box wrench would set in the system. Here you can see the tool and the indent in the foam. It does a pretty good job of setting an imprint that matches the tool.

Like I said before, I think this is a nice tool storage system. Here is my overall breakdown of the Tool Lodge.

PROS

  • Tools look VERY cool. Hey, that matters

    tool box organization

    This is what an unorganized tool drawer looks like

  • Tools will always have a set place.
  • It is easy to see if something is missing.
  • Things can not roll around in the draw
  • Tools are easy to set in the foam
  • This is a GREAT system when people share tools
  • The felt will not mar tools
  • Product is well built
  • Custom sizes to most tool box drawers
  • The grip tool is great to get tools out fast.
  • No cutting of foam.
  • It’s way better than the foam that you pluck the squares out of

Cons

  • Once the tools are set, there is no changing or adding tools
  • I am slightly concerned about long term use, the tools may not fit as tight down the road
  • I worry about what happens if you drop a tool on the foam. Light tools would be fine, but something with some weight might dent the foam.
  • The felt seems to hold some dust. This is not a big deal, just a minor.
  • I wonder about oil saturation on the foam. My tools are not always spotless when I put them away. This is a Charles thing. It probably does not apply to some folks.
  • The drawer you use it in needs to be 2 or more inches deep.
  • It is a bit pricey to outfit an entire tool box

Well that about wraps it up. I think Tool Lodge did a good job building this product. For the person looking for this type of organization, I think you will dig this! If you have any questions about Tool Lodge, please post them in the comments. I will also be setting a few more tools just to see how they form.

Humble Mechanic Logo

Happy Monday everyone. I hope that you all had a great weekend. I am not really a fan of the weekend after Thanksgiving. Now that many stores open on Thursday, I guess I need to add Thanksgiving day to that list. I spent years working retail. This time of year was awful. Seeing people fighting over junk. Best wishes to all of you that work retail.

Moving on 😉 Today I want to give you all some advice to avoid some big time frustrations with your car. For me, the 3 days before Thanksgiving are insane. I made more hours Monday, Tuesday, and Wednesday, than I did 2 weeks ago. The dealer could have had 5 more techs and we still would have not been able to help everyone.

As someone that has been in the car business for a while, it is beyond me why so many people wait until the last minute to get their car serviced. I guess it is because the average driver considers their car an after thought. But waiting until the last minute for service can result in frustrations.

Here is how a conversation goes between a customer and a service advisor

Customer: (Calling on Monday before Thanksgiving) “Hi I need to get my car in for service”
Service writer: “Hi, we are taking appointments for Saturday, or for next week”Customer: ” But I need to get my car serviced tomorrow. We are going out of town”
Service writer: “I would love to help you, but lots of folks are traveling as well”
Customer: “Well I need to get my car serviced. Why don’t you have time to help me”
Service writer: “I would love to help you. I just can not bump other customers appointments”
Customer: “That’s BS. I can’t believe you wont help me.”
Service writer: “We can get you in Saturday”
Customer: “No, it needs to be before Thanksgiving”.

By now you get the point. As the conversation goes on, the customer and service writer both get tense. The customer is mad, the writer is mad, and the dealer doesn’t get the work. As a customer, there is little you can do to force a service dept. to get your car in for service. What can we do as customers? I am glad you asked.

DON’T WAIT UNTIL THE LAST MINUTE!
Simple right? Call to make an appointment a week before the holiday, or your road trip. That way if your car has an issue, you have time to get it fixed. Last year my wife and I took a road trip to Illinois. It was a trip of about 2000 miles total. While I was getting ready for the trip, I wrote 3 posts about getting your car ready for road trips. We talk about starting to get the car ready 2-3 weeks before the road trip.

BE FLEXIBLE
You are trying to get your car serviced at one of the busiest times of the year. If you do wait, leave some extra time to get your car serviced. Please don’t leave a 20 minute window to get service. If your service department is booked at that time, you are stuck.

You might be thinking that service departments should be doing more to accommodate customers this time of year. I would 100% agree. Service departments should have all hands on deck so to say. But like I said, we can’t do anything to make them do that. So we have to take the initiative.

I hope you all really did have a great holiday weekend. For the first time in the 15 or so years I have known my wife, we both had the weekend off. That was pretty cool. I will have an update about the Cabby tomorrow, and hopefully have some Shop Shots for you on Wednesday. I didn’t realize how long it had been since the last round of Shop Shots.

Here are the 3 posts about prepping your car for a road trip:

MK! VR6 Volkswagen engine swap DIY

MK! VR6 Volkswagen engine swap DIY

Hi folks! I hope that you all had a great weekend. I had a productive Sunday working on the Cabby. I will  tell you all about it. First I have a couple of things to let you guys know.

Dubs For A Cause.
I have mentioned it before, but the show is coming up quick. If you plan to make the show PLEASE let me know. I always like meeting you guys. Plus this show is for charity. It does not get much better.

Travel last week
I spent a bunch of time in the car last week. Tuesday my boss and I drove to Charlotte, NC. We went to a job fair at NASCAR Technical Institute. I spent the day chatting with about 100 future technicians. It was a very cool/strange/fun event. I also snuck down to Euro-Wise, but more on that in a minute. My wife and I also took a mini vacation to Asheville,NC. We were only there for a day, but we had a blast as always.

Travel this week
This week I will also be doing some traveling. I will be in training for the better part of the week. It is about a 5 hour drive there, and a 7 hour drive back. Thank you DC traffic. The class is some type of diagnostic training. I don’t have much more info than that. I will do a post about it and fill y’all in on the details.

A little help
With my traveling this week, I have a chance to record a few podcasts. I just need some help from you guys. What do you want us to talk about? I have a few ideas, but I need some help. Post your ideas in the comments below. Here is what I am thinking

  • Winter Car preps. It may be a little late for some of you, but this is very important.
  • Mechanic training. Since I will be going to training, this makes sense
  • Tools. I am thinking specifically about tool costs, what techs need to start with, and some differences between pro level tools and average consumer tools

Alright, we have all that wrapped up, let’s talk Luv A Dub!

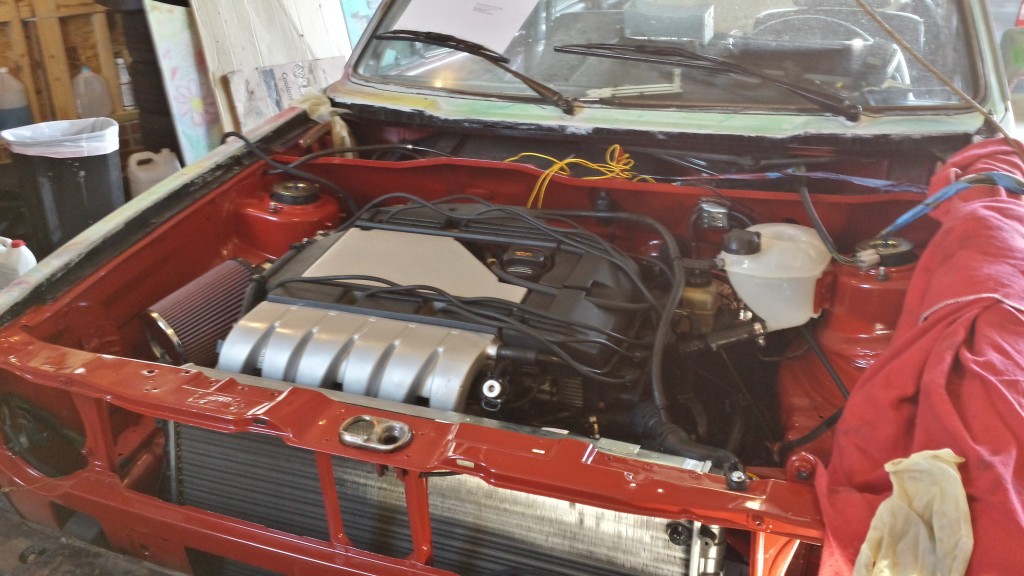
MK! VR6 Volkswagen engine swap DIYWhile the VR6 base engine has been installed in the Cabby for a while, I just installed all the “accessories”. That means I installed the following:

  • upper intake manifold
  • air intake with sensor and K&N filter
  • Radiator
  • Header
  • Exhaust
  • A full exhaust, thanks to boys at Euro-Wise!

I also finally hooked up all the coolant lines, and electrical connectors. We are very close to having a running car.

MK! VR6 Volkswagen engine swap DIYHere is another engine bay shot. Once I have the car properly running, I will clean up the wiring that is just throw in the bay. I want to make sure everything runs properly before I do the final fit of the wires. Plus the painted part of the engine cover is at work. 😉

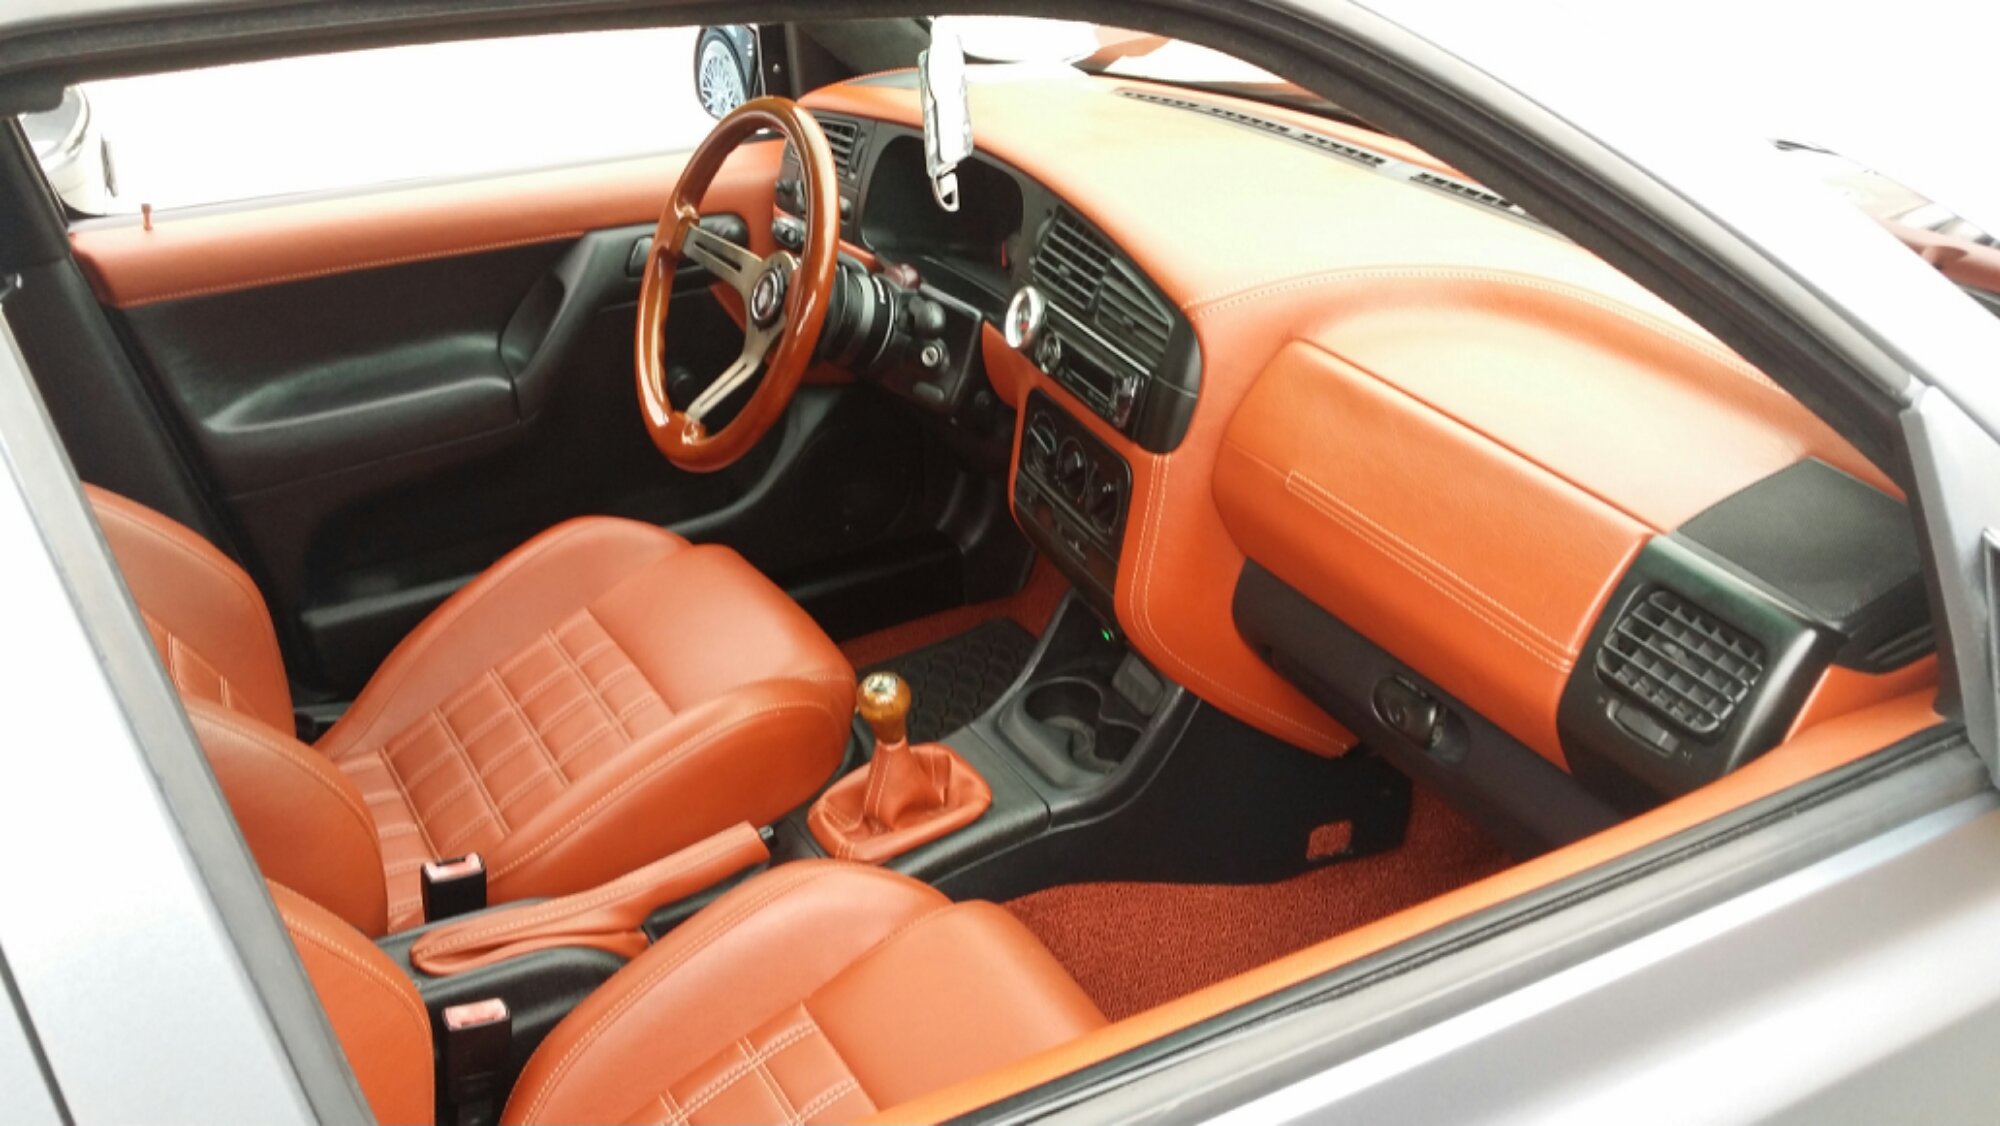
MK! VR6 Volkswagen engine swap DIYMuch like the engine, the interior has come along way. But also has a little ways to go. I still have to swap the lower dash cover, all the door cards, the center console, and the rear seats. Plus add all the little things like ashtray and vents in the dash.

Well that is where we are at with the Cabby. It has been a long long road. I am hoping to have the exhaust part welded today. If that is the case, I should have her running today. Don’t worry, I will shoot a ton of video of her first start. I hope it all goes well.

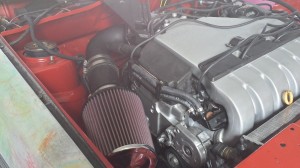
K&N Air filter

Hey everyone. Today I am traveling with my boss out to NASCAR Technical Institute in Charlotte,NC. We are planning to hire a few rookie techs. For me it’s about a two and a half hour road trip. I will also be taking a little detour to see some folks at a certain tuning shop in Charlotte, NC. For those of you that know what I mean 😉 more to follow.

As many of you know I am currently in the process of building of restoring a 1988 VW Cabriolet aka project “Luv A Dub”. Not only am I bringing this Cabby back to life, I am installing a freshly rebuilt VR6. This will take the horsepower from a weak 90hp to 172hp. That is a nice increase in power, especially from a ~2300lb car.

The awesome folks at AutoAnything.com asked me if K&N Air filterthey could help out with the project. As their name says, Auto Anything sells just about anything your car might need. We decided that putting a K&N air filter on the Cabby was the way to go.

If you are not familiar with K&N filters, they are a filter that never needs to be replaced. Instead of replacing the filter you can clean it. I will put some videos about cleaning a K&N filter at the bottom of the post. Not only are K&N filters reusable, they also let more air flow through than many disposable air filters. For all the stats on K&N filters check out their site KN Filters.

After We decided on going with K&N for the filter, Kelly from Auto Anything helped me pick the right filter for the Cabby. This was not your average task. This is a custom application. After some measuring on my end, and a few emails, they got me the exact filter I needed. Don’t worry, if you are replacing your factory size filter, getting the right one is much easier.

There is some controversy about using oil charged filters on VWs. I can tell you I have replaced tons of air flow sensors on cars with K&N filter. I have also replaced tons of air flow sensors with out K&N filters. Just like any part you use, you must make the choice on your own.

K&N Air filter

This is a close up of the filter element of the K&N filter.

if you have any questions, thoughts or comments about K&N filters, post them in the comments below. I will also tell you guys that I am also traveling on Wednesday and Thursday this week. Be sure to follow the Facebook page, Twitter, and Instagram. I will be posting picture from the road. One last thing. My wife and I had a chance to check out the Porsche By Design exhibit at the NC Art Museum. It was awesome! I posted a bunch of pictures on FB. When I get back, I will post more on the blog.

Purolator Oil Filter ReviewHey everyone. A few weeks ago I did a video about changing your own oil. The response has been huge. Because of the response, I thought I would follow up that video and write a little more information about changing your own oil.

Changing your cars oil is one of the easiest things to do yourself. That being said, a mistake here can be very costly. An oil change is one of the most important things you can do to keep your car’s engine happy. Be sure to follow the manufacturers recommended service interval. So before you dive into changing your own oil, let’s talk about some do’s and don’ts.

DO’s

  • Have a basic understanding of your car
  • Proper hand tools for your car
  • Have all the parts you need for the service. We will talk more about this later
  • Have a proper container to catch the oil
  • Be sure to have something to store the old oil.
  • Properly dispose of the oil, oil and filter.
  • Keep a record of the service

Don’ts

  • Be in a hurry
  • Cheap out of your parts
  • Forget to work safe
  • Put engine oil in the trash.

As you can see, there are plenty of things to keep in mind when doing your own oil change. Before we get into the steps to change your oil, let’s make sure we have all the right stuff.

Parts
It should come as no surprise, having the right oil, filter and washer is VITAL! You do not want to be the person that has to duct tape their oil filter back on. Yes, I have seen that happen. I talked a little about the differences in oil filters in the Purolator Review Post. Check that out for some filter features to consider. When it comes to oil, follow the manufacturer spec to the letter.  If you are not 100% sure about the oil you need, call your dealership’s parts department. They can tell you exactly what you need, and how much oil your car requires.

Tools
This will be highly vehicle specific. While I can’t list every tool to change oil, here are the parts you will need tools for:

  • Engine oil filter
  • Drain plug
  • Check your car for any cover that need to be removed. This may require more tools
  • Tools to remove the washer on the drain plug.
  • A funnel to add oil
  • Rags or towels for clean up
  • Drain bucket to collect oil
  • Your application may require some other special tools, especially if you drive a German car 😉

The Process
When I change oil, I have a very strict process I follow. It really is borderline OCD. You do not need to have such a strict process, but having a game plan is really important. Doing an oil change is also an opportunity to check the overall heath of your car. Here is my process for changing oil:

Damaged oil drain plug

Bad practices lead to destroyed oil pans

  1. Be sure you have ALL the parts to do the service. We don’t want to have to run out to the store during the service.
  2. Check the engine oil on level ground before you start.
  3. Raise the front of the car up. If you are using a floor jack, be sure to safely secure the car with jack stands. At home, I prefer the drive-on style ramps.
  4. Place the drain pan under the engine. Depending on how hot the engine is, the oil may “shoot out”. Be sure to place the pan accordingly. Also have your towels ready for any oil spills
  5. Allow the engine oil to drain for about 10 minutes. This will get most of the engine oil out. Remember, we are not in a hurry.
  6. Replace the washer on the drain plug, and properly tighten the drain plug.
  7. Remove the engine oil filter. Allow the oil to drain out of the filter.
  8. Before replacing the filter, put a thin film of oil on the filter.
  9. Properly tighten the filter.
  10. Replace any cover that you may had to remove.
  11. Lower your car on to level ground.
  12. Fill the engine with the recommended amount of engine oil.
  13. Double check the engine oil on the dipstick.
  14. Triple check the engine oil on the dipstick
  15. Start your car and let it run for about a minute.
  16. Shut the car off, and let it rest for 2-3 minutes.
  17. Recheck the engine oil level, and adjust as needed.
  18. Check and top off the coolant, power steering fluid, washer fluid, and transmission fluid(if applicable)
  19. Double check your work. Make sure there are no oil leaks!
  20. Record the service
  21. Be sure to properly dispose of the engine oil.

Well, congratulations, you have just crushed your own oil change. You might be thinking that 21 steps is a lot of work. But with the right tools, the right parts, and a little know how, you can to it. I really do want to stress buying top quality parts.

If you have any question about changing your oil, please post it up in the comments. You can also learn more about the history of the engine oil filter here.

Disclosure
I was paid by Purolator to review for this post with Burst Media, all thoughts and opinions are my own. All products were provided by Purolator; however are items I genuinely enjoy and feel are appropriate for my site.


Happy Monday everyone. I hope that you all had a great weekend. For me it was an amazingly busy weekend. The highlight was attending the Black Forest Industries OktoberFest! This is the third year that Black Forest has held this car show. I didn’t attend the first year, but the show has really grown in number of cars.

I also had a chance to meet quite a few of you. That was really the best part. Checking out all the really nice VWs and Audis is cool. I really do enjoy meeting you folks and chatting cars with ya. Here are some of my favorite cars from the show. If you know who owns any of the cars, please comment and let me know.

As you can see there are some great cars. I didn’t get pictures of all of them. I really do like this event. It is small enough to really enjoy. Plus it is super local for me. 😉 Remember if you own any of these cars, or know the owner, send them over. They deserve credit for their ride!

Thanks for checking out this year’s BFI Oktoberfest pictures.