Tag Archive for: video

leaking 2.5 Vacuum pump

IMG_3779 2Hey everyone! It is Tuesday, so we are looking at failed VW parts. Today we are diving into the 2.5L vacuum pump leaking oil. Last week we looked at how a 2.0T rear main seal fails. The funny thing is, this vacuum pump leaking is often mistake for a leaking rear main seal. For a list of all the failed part shows, check out “Failed VW Part Videos” on YouTube.

Sponsor Of The Day
Today’s show is sponsored by Deutsche Auto Parts. They are the VW and Audi parts experts. They have great prices and awesome service. Plus they work really hard on a ton of VW DIY videos. Paul even hooked me up with a sweet custom Humble Mechanic/Deutsche Auto Parts bottle opener!

Join me as we take apart the 2.5L vacuum pump:

  • What the 2.5l vacuum pump does
  • How the 2.5l vacuum pump works
  • How the 2.5l vacuum pump FAILS!
  • The signs of 2.5l vacuum pump failure (hint it leaks oil 😉 )
  • Why the vacuum pump fails
  • How to diagnose 2.5l vacuum pump failures
  • DIY or Not?
  • Link to buy this pump 2.5l Vacuum pump
  • and more

Having trouble viewing? Watch “How The VW 2.5L Vacuum Pump Fails ~ Video” on Youtube

As always, your questions and comments are welcome. Please post them below. If you would like to suggest a part of a show like this, email me Charles(at)HumbleMechanic(dot)com. Also thanks to VW for hooking up some sweat VW Driver Gear.

Don’t forget to follow me at:

VW oil leakHey everyone, I hope that you are having a wonderful first Tuesday of 2015. Today we are taking a look at the failure of the 2.0T TSI (or TFSI) VW engine. For those of you that are new to the blog, every Tuesday, we look at a different failed VW part. As you will see we look deep into how it fails. This is one of the most popular shows here on HumbleMechanic.com. You can check out more Failed VW Parts videos on YouTube.

Sponsor Of The Day
The Sponsor of the day is DeutscheAutoParts.com. They are VW and Audi parts experts. They have awesome prices and incredible service. They also do great VW DIY videos. I have even made an appearance or two 😉

Today we look at the Rear main seal and see:

  • What the VW rear main seal does
  • How the VW rear main seal works
  • How VW rear main seal fails
  • Why the VW rear main seal fails
  • Ways to diagnose rear main seal failures
  • DIY or no DIY a rear main seal
  • Buy the 2.0t TSI rear main seal here.
  • and more

If you are having trouble viewing, watch “How The CCTA Rear Main Seal Fails ~VIDEO” on YouTube

As always, your questions and comments are welcome, please post them below. If you have a part you would like discussed on a show like this, email me Charles(AT)humblemechanic(dot)com and put “FAILED PART” in the subject. Or you can use the contact me form.

Podcast
Don’t forget to check out all the episodes of the Automotive Podcast, and Mechanic Tool Reviews

Don’t forget to follow me at:

MK1 VR6 VW Cabriolet

Hey everyone,

I posted a video of the Cabby a few weeks ago. It was pretty weak. So I thought I would post another test drive video. This one really gives a better feel of what it is like to drive this car. Plus the exhaust note is freaking awesome. Oh and be sure to watch until the end 😉

I am working on a guide for this sway. Some of the things that I ran into during the build. The ways that I tackled a few issues. It is still in the early stages but be on the look out for that soon.

Don’t miss Shop Shots tomorrow!

Driving Bart Simpson

Hey everyone. I hope that you are all having a great week so far. I am back in the shop today. Last weekend was my long weekend off. Ah the beauty of a 4 day work week. Okay, let’s get these pictures rolling. One more thing, I emailed the winner of the tray again. If I don’t hear from them by the end of the day, I will pic another winner.

Blown up Turbocharger TDIThis nasty mess is the outlet side of a failed TDI turbocharger. Normally this would be nice and shiny looking If you look close you can see he blades of the turbine. They are caked with oil sludge and carbon build up. I am not really sure what caused this to happen, or how long the customer had been driving the car like this. When it came into the shop, it was smoking like crazy.

The shaft that connects the compressor wheel and the turbine wheel broke. The turbine wheel is what you are looking at here. It is completely seized. We tried moving it with a hammer and it would not budge. The fix for this issue, anew turbocharger.

Driving Bart SimpsonYou may or may not know this, but I am a pretty big fan of The Simpsons. So when I seen this I had to snap a picture of it. This was a 4ft tall stuffed Bart Simpson. So big in fact that it would not fit in the trunk of this New Jetta. I have no idea where the customer got it, or why they still had it, but I think it’s pretty cool. If it were next week I would assume they won it at the State Fair. We may never know the truth. I just like seeing fun stuff like this.

Failed Chains on VW VR6I posted this to Facebook earlier today, but I wanted to tell more of the story here. This is the carnage of a VR6 engine. The bolt for the oil pump backed out of the pump. This caused the crankshaft to turn, but the cam shafts to stay still. This is equivalent to a timing belt breaking. The end result is 18 bent valves, a whole lot of gaskets and seals, and about 20+ hours of labor.

I have heard these make noise before. It get really loud long before engine damage occurs. Generally the MIL comes on too. I am not sure the exact circumstance with this one. I guess it doesn’t really matter, the damage is done.

Last up is a video I shot last week. Unlike the picture above, this shows a really lucky customer. One of the guys I work with called me over to check out a timing belt on a V8 Touareg. The belt was so loose that I could have taken it right off. I am not sure how the belt was even on the engine. It looked as if the tensioner failed. Seriously, this is one lucky customer.

Well that wraps up another Shop Shots. Don’t forget you can follow me on Facebook and Twitter. It is really easy, just click one of the little icons to the right, or to the left if you are reading upside down.

Humble Mechanic Logo

I was prepping my car for a road trip, and found I had a side marker light out. Here is a quick HOW TO video on replacing the light. This is the same as replacing a front side marker light on a Jetta and a golf.


Cabriolet Center Console

Well, I finally chose a name for the Cabby. Meet, project “Luv A Dub” I went back and checked the original post about the car. It just so happens that Garrett was the one that suggested it. Thanks Garrett!

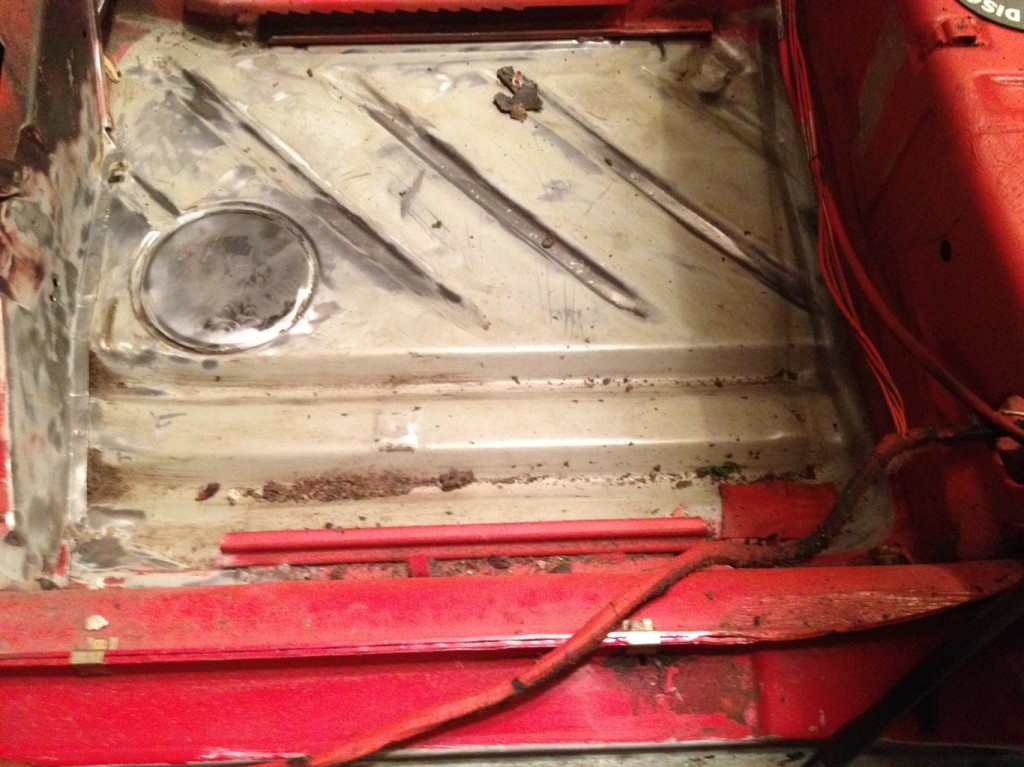
This weeks update is 2 parts. First, I am still working on the floor pan. Removing all the sound dampener, rust, and crud is very time consuming. I am still working on the driver’s side. I have been using a wire wheel on a drill to remove any rust and the remaining paint, and glue. Here is where I am at on the interior.

Volkswagen Cabriolet InteriorHere is the driver’s side rear floor pan. Just a very small amount of rust. I removed the sound dampener, then cleaned the rest with a wire wheel. Next will be a complete clean of the floor. That is the part I don’t care for.

Volkswagen Cabriolet InteriorHere is a good before and after shot. I have not done anything to the passenger side yet. Notice how awesome the paint is that was under the rear seat. That has me thinking that I want to keep it the factory color!

If you notived that the center console is missing, great job. I took it out to make removing all the dampener possible. Here is a video showing just how much “art” is on this car.

<iframe width=”640″ height=”360″ src=”http://www.youtube.com/embed/UPPbCi1zN60?rel=0″ frameborder=”0″ allowfullscreen></iframe>

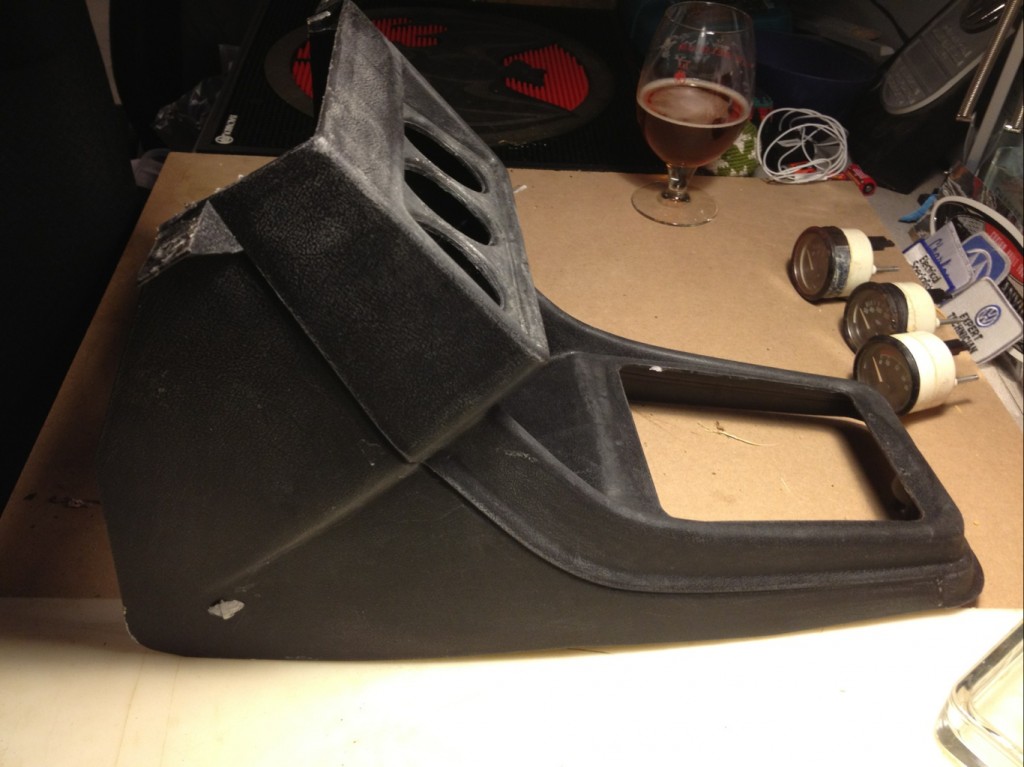
I am SO excited on how this came out. I will clean and restore the console so everyone can see how to do that.

Cabriolet Center Console

As you can see, the console came out great! I just wish the seats were that easy.

Well that pretty much recaps the work this week. Congrats to Garrett! I have a little gift pack for you. Just email me your address and I will send it to you. 😉

Have a great weekend everyone.

Removing Sound Dampener VW

HAPPY MONDAY Everyone!

I was having some technical issues Friday so this post had to hold off until today.

I got a Cabriolet update for you! My plan is to start with getting the interior all nice and pretty. Then I will move on to brakes, then suspension. After all that is complete, I should have the power plant and paint finalized(hopefully 😉 )

So today I am testing a method to remove the factory sound dampener from the car. I want to make sure there is no rust on the inside before moving forward. The heat method is the best way that I have found so far. I have heard that Dry Ice also works well. I will test that for you and we can all see the proof.

After all the sound dampener is gone, I will treat the floor with a paint treatment that will stop rust. Then I can put down some better quality stuff to help keep road noise and heat down..

Here are a couple of before and after shots.

I will also be ordering carpet this week. The best I have found comes out of the UK. It is a little more expensive, but it is already cut for the seats and the shifter. If I buy the stuff from the US, I will have to cut all the holes. The carpet basically comes as one giant “stamp”. I would have to tailor it to the car. 🙁